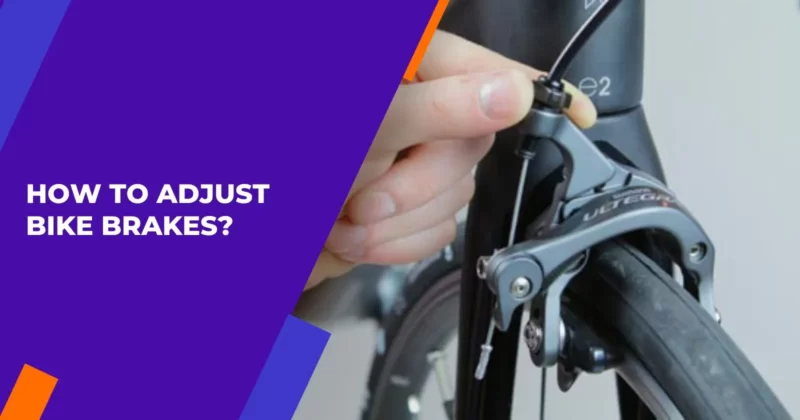
How to Adjust Bike Brakes?
Keeping your bike’s brakes in proper working condition is crucial for your safety and the overall performance of your ride. Regularly checking and adjusting your bike brakes ensures that you can stop quickly and confidently, especially when navigating through traffic, downhill descents, or tricky terrains.
However, many cyclists often overlook this essential maintenance task, risking their well-being on the road. In this article, we will explore the topic, “How to adjust bike brakes”
Whether you’re a novice cyclist looking to learn how to keep your bike safe or an experienced rider seeking a refresher course on brake adjustment techniques, this article has got you covered.
But why should you take the time to adjust your bike’s brakes yourself? Isn’t it easier just to bring it to a local bicycle shop for professional servicing?
While professional maintenance is undoubtedly important at times, being able to check and make minor adjustments yourself gives you greater confidence and control over one of the most critical components of your bike.
By learning how to adjust your own brake system effectively, not only can you save valuable time and money but also gain a deeper understanding of how these vital mechanisms function.
By acquiring these skills as part of a regular bike care routine, you’ll be better equipped to identify potential issues before they become major problems on the road.
So whether it’s an irritating squeal coming from worn-down brake pads or excessive play in the levers affecting braking responsiveness – don’t let these issues compromise both performance and safety!
Let’s dive in together as we demystify brake adjustment methods specifically catered towards all levels of cycling enthusiasts. Prepare yourself for enhanced riding experiences; join us as we empower bikers with knowledge on keeping their bicycles’ stopping force at its peak efficiency!
Table of Contents
Types of Bike Brakes
When it comes to bike brakes, there are two main types that cyclists commonly encounter: rim brakes and disc brakes. Rim brakes have been around for decades and are the most traditional form of braking system.
They use friction between brake pads and the rim of the wheel to slow down or stop the bike. On the other hand, disc brakes are a newer technology that has become increasingly popular in recent years.
Instead of using the wheel rim as a braking surface, disc brakes operate by squeezing specialized brake calipers against a rotor attached to the hub of the wheel. So what are some key differences between these two types?
One major distinction is their performance in wet conditions. Rim brakes can be less effective when it’s raining or if you’re riding through mud puddles because water can affect their ability to grip onto the rim properly.
In contrast, disc brakes generally perform better in wet conditions due to their design being less affected by water on the wheels. Another significant difference is maintenance and durability.
Rim brake pads tend to wear out more quickly since they constantly rub against the rims when applying pressure to stop power. This means they need frequent replacing compared to disc brake pads which last longer since they don’t come into direct contact with any moving parts on regular rides.
Understanding these fundamental distinctions between rim and disc brakes will help riders make informed choices about what type of braking system suits their needs best.
Tools Needed
To successfully adjust your bike brakes, you will need a few essential tools. Having these tools readily available will make the process much smoother and ensure that you have everything you need to complete the job properly.
Firstly, you’ll need an Allen wrench set or a multitool with various sizes of Allen wrenches. These are used for adjusting brake pad position and tension on most modern bikes.
Secondly, having a pair of needle-nose pliers is handy when dealing with cable tension adjustments and fine-tuning brake alignment. Thirdly, don’t forget to have a good quality adjustable wrench or spanner.
This tool is necessary for loosening or tightening nuts and bolts on certain types of brakes such as V-brakes or cantilever brakes. Having a flathead screwdriver can be useful for adjusting old-style caliper brakes.
Lastly, consider getting yourself some cable cutters if you plan on doing more extensive brake maintenance over time. These special cutters cleanly trim frayed cables without causing any damage to them.
By making sure that these essential tools are in your possession before starting your brake adjustment task, you’ll greatly increase your chances of successfully completing the job without any hiccups along the way.
Rim Brake Adjustment Steps
To ensure optimal performance and safety while cycling, it is essential to regularly adjust your rim brakes. Follow these step-by-step instructions to properly set up and fine-tune your rim brakes.
The first task in adjusting rim brakes is centering the brake pads. Start by loosening the bolts that hold the brake pads in place.
Squeeze the brake lever firmly a few times to position the pads against the rim surface. Next, visually inspect both sides of the wheel to ensure that each pad makes equal contact with the rim.
Make any necessary adjustments by tightening or loosening individual brake pad mounts until they are symmetrical. After centering the pads, align them precisely with the rim surface for effective braking performance.
Ideally, there should be an even gap between each pad and its corresponding sidewall when you pull on the brake lever lightly. To achieve this alignment, use a small tool (such as an Allen wrench) to adjust each individual pad’s mounting bolt until they sit correctly against their respective sides of the rim.
Once you have centered and aligned your brake pads, it’s time to fine-tune cable tension for optimal braking power without causing excessive drag on your wheels. Begin by releasing all cable tension using either barrel adjusters or quick-release mechanisms specific to your bike model.
Gradually tighten one side’s cable until you notice a slight amount of resistance when pulling on both front and rear levers simultaneously—ensuring neither side feels tighter than the other during gentle hand pressure tests.
Remember that mastering this adjustment may require some trial-and-error initially concerning personal preference and variations in different bike models’ designs; however, practice will help build confidence over time.
Disc Brake Adjustment Steps:
To ensure optimal performance and a smooth, rub-free braking experience, follow these detailed disc brake adjustment steps:
1. Pad Alignment
The first step in adjusting disc brakes is to ensure proper pad alignment. Start by loosening the mounting bolts that hold the brake caliper in place, but do not remove them completely. Squeeze the brake lever firmly to bring the pads closer to the rotor or use a pad spacer if necessary.
While holding the brake lever, tighten one of the mounting bolts just enough to hold everything in place and then carefully align both pads on either side of the rotor parallel with a minimal gap between them.
2. Rotor Truing (if needed)
After aligning the pads, it’s essential to check if your rotor needs any truing. Over time, rotors can develop slight bends or warps from impacts or excessive heat build-up during hard braking.
To determine if your rotor needs truing, give it a spin while observing its movement closely. If you notice any wobbling or rubbing against the pads as it rotates, you may need to true your rotor using specialized tools like a brake rotor truing gauge or an adjustable wrench.
3. Dialing in Lever Reach
Once your pads are aligned and your rotor is properly trued, it’s time to dial in some finer adjustments for optimal braking performance – starting with lever reach adjustment on hydraulic systems or mechanical systems equipped with adjustable levers.
Lever reach refers to how far back or close to the bar your brake lever sits when at rest position before engaging with full stopping power when squeezed fully.
By reaching behind each brake lever assembly per handlebar setup type: road bar vs flat bar – adjust their firmness independently towards achieving the desired feel & modulation levels fit for personal preference!
These steps will help you achieve better control over braking power while providing enhanced safety and efficiency during rides on terrain that demands quick responses and precise stops
Common Issues & Troubleshooting Tips
Even with careful adjustments, there may still be some common issues that arise during brake adjustment. One frequent problem is uneven brake pad wear.
This can result in one brake pad making better contact with the rim or rotor than the other, causing an imbalance in braking power. To troubleshoot this issue, start by inspecting the position of the pads and adjust them if necessary to ensure even contact.
Make sure that the wheel is properly aligned and centered within the brake caliper. Another issue that cyclists often encounter is a squeaking noise when applying their brakes.
This can be caused by various factors such as dirty rims or contaminated brake pads. To address this problem, clean both the rims and brake pads thoroughly using a mild detergent and water solution.
If cleaning doesn’t solve the issue, try sanding down any glazing on the brake pads using fine-grit sandpaper. In some cases, riders may experience reduced stopping power despite proper adjustments being made to their brakes.
This could indicate worn-out brake pads or rotors that need replacement. It’s important not to ignore this sign as compromised braking performance can put your safety at risk.
Regularly inspect your brake components for signs of wear such as thinning brake pad thickness or visible grooves on rotors.
By being aware of these common issues and armed with troubleshooting tips, you’ll be better equipped to handle any hiccups that may occur during the bike brake adjustment process
Final Safety Checks
Before testing your bike’s brakes, it’s important to take a few final safety checks to ensure everything is in proper working order. First, give your entire bike a once-over and check for any loose bolts or components.
This includes the brake calipers themselves, as well as any other parts that may affect brake performance such as cables and levers. Next, inspect the condition of your brake pads.
Look for any signs of excessive wear or damage, such as cracks or missing chunks. If you notice these issues, it’s crucial to replace them before attempting any adjustments or testing the brakes.
Once you’ve visually examined the brakes and surrounding components, it’s time to do a quick intuitive test before hitting the road.
Stand next to your bike and squeeze both brake levers firmly while applying a bit of pressure on each side of the bike in order to simulate weight distribution from the riding position on both breaks simultaneously.
During this test listen carefully for any squealing sounds indicating misaligned pads rubbing against rims or rotors incorrectly which would be causing inefficiency during braking.
Make note if there is a significant dragging noise coming from either break side regardless of whether the wheel spins freely when unhampered by friction contact light drags will not significantly impact stopping power just some rubbing sound only significant issue with extreme drag (you need professional help).
Conclusion on How to Adjust Bike Brakes
In conclusion, maintaining properly adjusted bike brakes is essential for both safety and performance. After following the step-by-step guide outlined in this article, you should now have a good understanding of how to adjust your bike brakes effectively.
Remember that regular maintenance is key to ensuring your brakes remain in optimal condition, so it’s important to periodically check and readjust them as needed.
Understanding the function of your bike’s braking system can give you a deeper appreciation for how it enhances your riding experience.
As you become more familiar with adjusting bike brakes, consider experimenting with different brake pad materials or lever adjustments to tailor your bike’s braking performance to suit your individual preferences.
By mastering the art of adjusting bike brakes, you’ll not only enhance your ride quality but also increase your overall confidence on the road or trail.
Wow superb blog layout How long have you been blogging for you make blogging look easy The overall look of your site is magnificent as well as the content