How to Remove Bike Pedals?
Are you an avid cyclist looking to improve your bike maintenance skills? Or perhaps a beginner cyclist wanting to learn the basics of bike care? Whatever the case may be, one essential skill every rider should have in their toolkit is knowing how to remove bike pedals.
This seemingly simple task can often become a frustrating and time-consuming endeavor if not done correctly. In this article, we will take you on a step-by-step journey that will demystify the process of removing bike pedals.
With clear instructions and helpful tips, we aim to make this task effortless and efficient for cyclists of all levels. But why is it important to know how to remove bike pedals?
One reason lies in ensuring proper maintenance and longevity of your bicycle. Over time, dirt, dust, or corrosion can accumulate on pedal threads, making it difficult to pedal smoothly or even causing damage if neglected for too long.
Regularly removing and cleaning your pedals not only helps improve performance but also prolongs their lifespan. So buckle up as we dive into our instructional guide on how to remove those stubborn pedals from your beloved two-wheeler!
Whether you’re preparing for a thorough clean-up or upgrading components, you’ll be equipped with the knowledge needed to tackle this task with ease.
Table of Contents
Safety Precautions
When it comes to any type of bike maintenance, safety should always be a top priority. Before you even start removing bike pedals, it’s crucial to ensure that you are properly equipped with the necessary protective gear.
Wearing a helmet and gloves can help protect your head and hands from potential injuries during the process. In addition to wearing protective gear, using the right tools for pedal removal is essential.
Using improper or ill-fitting tools can not only make the task more difficult but also lead to damage to both the pedals and your bike’s crank arm.
To avoid this, make sure you have a proper pedal wrench or Allen key that fits securely into your pedal spindle. This will provide stability and precision as you remove each pedal.
Remember, accidents can happen at any time, no matter how experienced you are in bike maintenance tasks. So take these safety precautions seriously every single time you work on your bike – it’s better to be safe than sorry!
Tools Required
To effectively remove bike pedals, you’ll need a few specific tools. The primary tool you will need is a pedal wrench. This specialized wrench is designed to fit snugly over the flats of the pedal spindle, allowing you to apply enough torque to loosen or tighten the pedals securely.
Another tool that might come in handy is an Allen key, particularly if your pedals have been installed with hexagonal bolt heads. Having the right tools for the job makes all the difference when it comes to removing bike pedals efficiently and safely.
It’s important to invest in good quality tools that are appropriate for your bicycle model and pedal type. A proper pedal wrench will ensure that you can exert sufficient force without damaging either your pedals or your crank arm threads.
Remember, using makeshift tools or incorrect-sized wrenches can lead to stripped nuts, rounded edges, and frustration during this process. So make sure you have the necessary equipment before attempting to remove your bike pedals!
Identify Pedal Types
When it comes to removing bike pedals, the first step is to identify the type of pedals on your bike. There are two main types of pedals commonly found on bikes: flat pedals and clipless pedals.
Flat Pedals
Flat pedals are the most basic type of pedal and feature a large platform where you can rest your foot. They are popular among casual riders and those who prefer not to use cycling-specific shoes.
Removing flat pedals is relatively straightforward as they usually have a standard thread that requires turning in a counterclockwise direction (when looking at the crank arm from outside).
However, it’s worth noting that there may be variations in removal methods for different brands or models, so always consult the manufacturer’s instructions if you’re unsure.
Clipless Pedals
Clipless pedals, despite their confusing name, actually involve clipping into special cycling shoes using cleats attached to the bottom of the shoe. These are predominantly used by road cyclists and mountain bikers seeking better power transfer and pedal efficiency.
Removing clipless pedals typically involves releasing them from dedicated release mechanisms incorporated into the pedal system. While some clipless systems have unified removal procedures, others may require specific tools or techniques based on their design.
Therefore, it’s crucial to refer to your specific brand/model instructions or seek guidance from an experienced cyclist if you’re new to clipless pedal maintenance.
By identifying whether you have flat or clipless pedals before proceeding with their removal, you’ll ensure that you follow appropriate techniques for each type without risking any damage or frustration along the way.
Step-by-step Process for Removing Pedals
When removing bike pedals, it’s important to follow a step-by-step process to ensure a safe and effective procedure. Here are the key steps to remove bike pedals:
1. Locate drive-side and non-drive-side pedals
When it comes to removing bike pedals, the first step is to familiarize yourself with the drive-side and non-drive-side pedals. The drive-side pedal is located on the same side as your bike’s drivetrain, typically on the right-hand side.
This pedal has a regular or right-handed thread, which means you’ll need to rotate it counterclockwise to loosen and remove it.
On the other hand, the non-drive side pedal is positioned on the opposite side of your drivetrain, usually on the left-hand side. This pedal has a reverse or left-handed thread, requiring you to turn it clockwise for removal.
2. Understanding proper rotation direction for each pedal type
To successfully remove your bike pedals without any mishaps, knowing and following the correct rotation direction is crucial.
If you’re uncertain about which direction to turn each pedal for loosening and removal, remember this simple rule: Righty tighty, lefty loosey.
Applying this concept will help you easily determine if you should rotate a specific bicycle pedal clockwise or counterclockwise depending on its threading orientation.
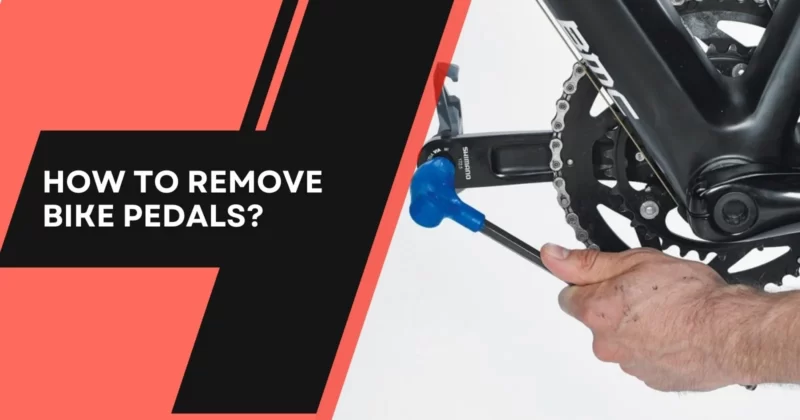
3. Insert an appropriate tool into the pedal spindle socket
Once you’ve identified whether a particular bike pedal has regular (right-handed) or reverse (left-handed) threading, grab an appropriate wrench that matches its size.
Most commonly used are 15-millimeter wrenches; however various bikes may require different sizes such as 9/16-inch wrenches for newer models that utilize flat pedals with smaller spindles.
4a. For flat pedals
If your bike’s pedaling platform consists of traditional flat pedals without any clips or straps attached, you’ll need to apply force in either a clockwise (regular threaded) or counterclockwise (reverse threaded) motion.
Depending on how tightly these flats have been installed, and possibly due to rust/buildup/seizing up, you may need to use an additional tool for extra leverage such as a pedal wrench or breaker bar. This will give you more control and allow you to exert greater force when attempting to break the pedal’s resistance.
4b. For Clipless Pedals
In the case of clipless pedals that are commonly used by cyclists who prefer a secure attachment between their shoes and bicycle, before removing them, ensure that any tension adjustment screws have been appropriately adjusted beforehand.
These screws vary across different brands and models of clipless pedals but can be usually found near the spindle area on either side. Use the appropriate tool, such as Allen keys, to make these adjustments until the desired tension is achieved.
Once done, take your wrench matching its size, and rotate in accordance with threading orientation— clockwise for regular thread or counterclockwise for reverse thread—to remove the clips entirely from your bike’s crank arms.
Tip: Ensure stability by positioning your bicycle properly during this process
Regardless of whether your bike pedals are flat or clipless, maintaining stability throughout this procedure is crucial. To prevent any accidents or mishandling during removal, prioritize placing your bicycle in an upright position.
You can accomplish this by using a bike stand, or a wall mount, hanging it securely upside down from the handlebars/saddle/top tube junction area while grasping onto rear wheels.
With firm support, you’ll have better control over both feet so you can effectively apply necessary force without losing balance. In addition, stabilizing yourself will also minimize the chances of scratching/damaging paintwork/other parts.
Troubleshooting Tips
a) If a pedal feels stuck or difficult to loosen, there are a few things you can try before giving up in frustration. One effective method is to apply some penetrating oil to the threads and let them sit overnight.
This will help break down any rust or corrosion that may be binding the pedal. Make sure to wipe off any excess oil before attempting removal again.
b) In some cases, you might encounter a stubborn pedal that refuses to budge no matter how hard you try. Don’t worry – there are additional leverage tools that can come in handy here.
A pipe wrench is one such tool that can provide extra torque for stubborn pedals. Wrap a cloth around the pedal spindle first to protect it from scratches, then use the pipe wrench with caution and apply steady pressure in the direction of removal.
Remember, safety should always be your top priority when working on your bike. Take extra care when using leverage tools as they have more force behind them and could potentially cause damage if used incorrectly.
It’s always better to seek professional assistance if you’re unsure or uncomfortable with certain steps of removing bike pedals.
By utilizing these troubleshooting tips when faced with an uncooperative pedal, you’ll increase your chances of success and ensure a smoother experience during this important maintenance task
Conclusion on How to Remove Bike Pedals
In conclusion, removing bike pedals may seem like a simple task, but it requires the right tools and techniques to avoid damaging your bike. It’s important to remember that the left pedals have reverse threading, so turn them clockwise to loosen them.
Applying lubricant to stubborn pedal threads can make the removal process much smoother. Remember that regular maintenance of your bike pedals can prevent them from getting stuck in the first place, so a periodic check and cleaning can go a long way.
Always double-check the tightness of your newly installed pedals before going on a ride to ensure safety. Finally, if you encounter any challenges during the removal process or have doubts about tackling it yourself, consulting a professional at a local bike shop is always a wise decision.
With these tips and insights in mind, you’ll be better equipped to handle pedal removal with ease and keep your biking experience smooth and enjoyable.