How To Tighten The Rear Hub On A Mountain Bike? [6 Routine Maintenance Tasks]
 The Short Answer is: The Short Answer is: |
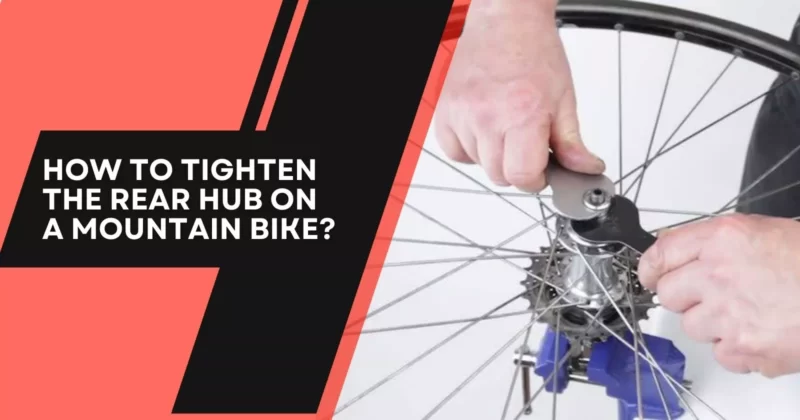
To tighten the rear hub on a mountain bike, you need to remove the wheel from the bike. If the hub is loose, you can adjust the cones on either side of the hub. To do this, use a cone wrench to hold the cone in place while you use another wrench to tighten the locknut against the cone. Check the tightness of the hub by spinning the wheel and feeling for any play or wobbling. Repeat the process until the hub is tight and there is no play in the wheel. |
If you’re an avid mountain biker, you know how important it is to keep your bike in good condition. One of the most common issues that riders face is a loose rear hub. A loose hub can cause the wheel to wobble, which can be dangerous and make for an uncomfortable ride.
In this article, we’ll show you how to tighten the rear hub on a mountain bike. We’ll cover the steps you need to take to adjust the cones on either side of the hub and ensure that the hub is tight and there is no play in the wheel.
Table of Contents
Assessing the Rear Hub for Loose Bearings
Before you can tighten the rear hub on a mountain bike, you need to assess whether the hub uses loose or sealed bearings. Loose ball bearings, also known as “cup and cone” bearings, are commonly used in entry-level bikes, including hubs, bottom brackets, and headsets.
To check if your hub uses loose bearings, you need to remove the wheel and inspect the ball bearings for shininess and brightness.
If the balls are dull-looking, they should be replaced. If the cup is damaged, it typically cannot be replaced, and a new hub would be required.
Additionally, you can roll the axle on a flat surface and watch for a gap appearing as the axle rolls. If a bent axle is detected, a new axle is required.
Tools and Materials You’ll Need
To tighten the rear hub on a mountain bike, you’ll need a few tools and materials. Here’s a list of what you’ll need:
- Cone wrenches (usually 13mm and 15mm)
- Spoke wrench
- Grease
- Rag or paper towel
- New bearings (if necessary)
Make sure you have all the necessary tools and materials before you start working on your bike. It’s also a good idea to have a clean and well-lit workspace to make the process easier.
Safety Precautions and Bike Stability
When working on your mountain bike, it’s important to take safety precautions to avoid injury. Before tightening the rear hub, make sure your bike is stable and secure. Here are some safety precautions to keep in mind:
- Wear protective gear, including gloves and eye protection.
- Make sure your bike is on a stable surface and won’t tip over.
- Shift your bike into the lowest gear to make it easier to remove the wheel.
- Use a bike stand or have someone hold the bike steady while you work.
- Avoid touching the chain or other moving parts while the wheel is off.
- Keep your work area clean and well-lit to avoid accidents.
By taking these safety precautions, you can ensure that you stay safe while working on your bike and avoid any accidents or injuries.
Step-by-Step Guide to Tightening the Rear Hub
Tightening the rear hub on a mountain bike requires a step-by-step process to ensure that the hub is adjusted correctly. Here’s a guide to help you through the process:
Step 1: Removing the Rear Wheel
The first step is to remove the rear wheel from the bike. Shift the bike into the lowest gear to make it easier to remove the wheel.
Use a quick-release lever or a wrench to loosen the nuts or bolts that hold the wheel in place. Once the wheel is loose, lift it out of the frame and set it aside.
Step 2: Accessing the Hub Bearings
Once the wheel is removed, you can access the hub bearings. If your hub uses loose bearings, you’ll need to remove the locknuts and cones to access the bearings.
Use a cone wrench to hold the cone in place while you use another wrench to loosen the locknut. Once the locknut is removed, you can slide the axle out of the hub and remove the bearings.
Step 4: Adjusting the Hub Bearings
To adjust the hub bearings, you need to adjust the cones on either side of the hub. Use a cone wrench to hold the cone in place while you use another wrench to tighten the locknut against the cone.
Check the tightness of the hub by spinning the wheel and feeling for any play or wobbling. If the hub is too tight, loosen the locknut and adjust the cone until the hub is tight but not too tight.
Step 4: Reassembling the Rear Wheel
Once the hub is adjusted, you can reassemble the rear wheel. Replace the bearings if necessary and apply a thin layer of grease to the cones and bearings.
Slide the axle back into the hub and tighten the locknuts. Check the tightness of the hub again by spinning the wheel and feeling for any play or wobbling.
Once the hub is tight and there is no play in the wheel, you can reattach the wheel to the bike and tighten the nuts or bolts. Shift the bike through the gears to make sure the wheel is spinning smoothly and the chain is moving correctly.
By following these steps, you can tighten the rear hub on your mountain bike and ensure that your bike is in good condition for your next ride.
Testing the Tightened Rear Hub
After tightening the rear hub on your mountain bike, it’s important to test the hub to ensure that it’s adjusted correctly. Here are some steps to follow to test the tightened rear hub:
- Spin the wheel: Spin the wheel and listen for any unusual noises or grinding sounds. The wheel should spin smoothly and quietly.
- Check for play: Hold the wheel at the 3 o’clock and 9 o’clock positions and try to move it side to side. There should be no play or wobbling in the wheel.
- Check the chain: Shift the bike through the gears and make sure the chain is moving smoothly and not skipping or jumping.
- Check the brakes: Test the brakes to make sure they are working correctly and stopping the bike smoothly.
If you notice any issues during the testing process, you may need to adjust the hub again or make other repairs to your bike. By testing the tightened rear hub, you can ensure that your bike is safe and ready for your next ride.
Routine Maintenance and Checking for Wear
Routine maintenance is essential to keep your mountain bike in good condition and prevent issues like a loose rear hub. Checking for wear and tear is also important to catch any problems early on.
Here are some routine maintenance tasks you can perform to keep your bike in good condition:
- Clean your bike regularly to remove dirt and debris that can cause damage.
- Check the tire pressure and inflate the tires as needed.
- Check the brake pads and replace them if they are worn down.
- Check the chain for wear and replace it if necessary.
- Check the cables and housing for wear and replace them if necessary.
- Check the bearings in the hub and other parts of the bike for wear and replace them if necessary.
By performing routine maintenance and checking for wear, you can catch any issues early on and prevent more serious problems from occurring. This can help you keep your mountain bike in good condition and ensure that it’s safe and ready for your next ride.
When to Seek Professional Help
While tightening the rear hub on your mountain bike is a task that can be done at home, there are times when it’s best to seek professional help. Here are some situations where you may want to consider seeking professional help:
- If you’re not comfortable working on your bike or don’t have the necessary tools or experience.
- If you notice any issues with your bike that you’re not sure how to fix.
- If you’ve made adjustments to your bike and are still experiencing issues.
- If you’re not sure if your bike is safe to ride.
In these situations, it’s best to take your bike to a professional bike shop or mechanic. They can assess your bike and make any necessary repairs or adjustments to ensure that your bike is safe and ready for your next ride. It’s important to prioritize your safety and the safety of others when it comes to bike maintenance and repairs.
Frequently Asked Questions Related to Tightening the Rear Hub on a Mountain Bike:
Can you tighten a loose hub?
Yes, you can tighten a loose hub on a mountain bike. To do this, you need to remove the wheel from the bike and adjust the cones on either side of the hub. Use a cone wrench to hold the cone in place while you use another wrench to tighten the locknut against the cone. Check the tightness of the hub by spinning the wheel and feeling for any play or wobbling. Repeat the process until the hub is tight and there is no play in the wheel. If you’re not comfortable working on your bike or don’t have the necessary tools or experience, it’s best to seek professional help.
Why is my rear bike hub wobbling?
A wobbling rear hub on a mountain bike can be caused by damaged or loose hub bearings. To fix this issue, you need to remove the wheel from the bike and adjust the cones on either side of the hub.
If you’re not comfortable working on your bike or don’t have the necessary tools or experience, it’s best to seek professional help. Routine maintenance and checking for wear can also help prevent issues like a loose rear hub.
Why is my rear hub loose?
A loose rear hub on a mountain bike can be caused by damaged or loose hub bearings. Loose ball bearings, also known as “cup and cone” bearings, are commonly used in entry-level bikes, including hubs, bottom brackets, and headsets.
To fix this issue, you need to remove the wheel from the bike and adjust the cones on either side of the hub. If you’re not comfortable working on your bike or don’t have the necessary tools or experience, it’s best to seek professional help.
Conclusion on How To Tighten The Rear Hub On A Mountain Bike
In conclusion, tightening the rear hub on a mountain bike is an important maintenance task that can help prevent issues like a wobbling wheel.
By following the steps outlined in this article, you can adjust the cones on either side of the hub and ensure that the hub is tight and there is no play in the wheel. It’s also important to perform routine maintenance and check for wear to catch any issues early on.
If you’re not comfortable working on your bike or don’t have the necessary tools or experience, it’s best to seek professional help. By taking care of your mountain bike, you can ensure that it’s safe and ready for your next ride.